Have you ever planted a garden with high hopes, only to watch your plants struggle? The secret to gardening success often lies hidden beneath your feet. Knowing what’s in your dirt is key to understanding your garden.
Even seasoned green thumbs can waste hours and dollars on the wrong plants and fertilizers. Without knowing your garden’s foundation, you’re gardening blindfolded. But, there’s an easy fix for this common frustration.
Garden failures often come from hidden imbalances. Your plants might need specific nutrients, struggle with pH levels, or face toxic elements. These unseen factors can make all the difference between a thriving garden and a disappointing one.
Soil testing kits offer a simple solution to turn guesswork into science. They give clear insights into what your garden needs to flourish. In this guide, we’ll see how these affordable tools can save you time, money, and heartache. They help your garden reach its full potential.
The Secret to Gardening Success Lies in Your Soil
Every successful garden has a secret: healthy soil is key. Many new gardeners focus on picking pretty plants or watering them right. But the real secret is in the soil beneath our feet.
Soil is more than just dirt. It’s a living world filled with tiny creatures, minerals, and nutrients. This underground world helps your plants grow, bloom, and produce well. When your soil is healthy, your garden will thrive.
Think of soil as your plants’ main support. It gives them nutrients, water, and protection from diseases. Without testing your soil, you’re gardening without knowing your garden’s needs.
How Soil Quality Directly Impacts Plant Health
Soil and plant health are closely linked. Good soil helps roots grow strong. These roots then absorb water and nutrients well, helping plants grow strong.
Nutrients in soil affect plant growth. Nitrogen makes leaves green. Phosphorus helps roots and flowers. Potassium boosts plant health and fights off diseases. When nutrients are balanced, plants are healthier.
Soil structure is also key. Good soil drains well but holds enough moisture. It lets air reach roots and helps beneficial organisms move. These features help plants thrive.
Common Soil Problems That Plague American Gardens
Many American gardens face soil problems. Compaction is a big issue, hurting root growth and water flow. It’s common in heavy clay soils or where many people walk.
Soil pH problems are common too. Most plants like slightly acidic to neutral soil. But many soils are too acidic or alkaline, making nutrients hard for plants to use.
Nutrient imbalances are another problem. Too much fertilizer can harm plants. It’s important to test soil before fertilizing.
| Common Soil Problem | Symptoms in Plants | Typical Causes | Testing Method |
|---|---|---|---|
| Compaction | Stunted growth, poor drainage | Heavy foot traffic, clay soil | Penetration test |
| Improper pH | Yellowing leaves, nutrient deficiencies | Regional soil conditions, acid rain | pH test kit |
| Nutrient imbalance | Discolored foliage, weak stems | Over-fertilization, leaching | NPK soil test |
| Poor drainage | Root rot, fungal diseases | Clay soil, low-lying areas | Percolation test |
Regional Soil Challenges Across the United States
Soil varies across America, causing different challenges. The Northeast has acidic soils from rain and forests. The Midwest has heavy clay that drains poorly. The Southwest has alkaline soils that are hard for acid-loving plants.
Coastal areas have sandy soils that drain too fast. The Pacific Northwest has acidic, wet soils. Knowing your region’s soil helps you understand your garden’s needs.
Signs Your Garden Soil Needs Attention
Your plants show signs of soil problems. Stunted growth means nutrient or root issues. Yellow leaves often mean nitrogen or pH problems.
Poor flowering or fruiting points to phosphorus issues. Wilting plants after watering may have compacted soil. Pests and diseases can mean stressed plants from poor soil.
Water pooling after rain shows drainage problems. Soil that cracks and hardens during dry spells has poor structure. These signs mean your garden needs soil testing.
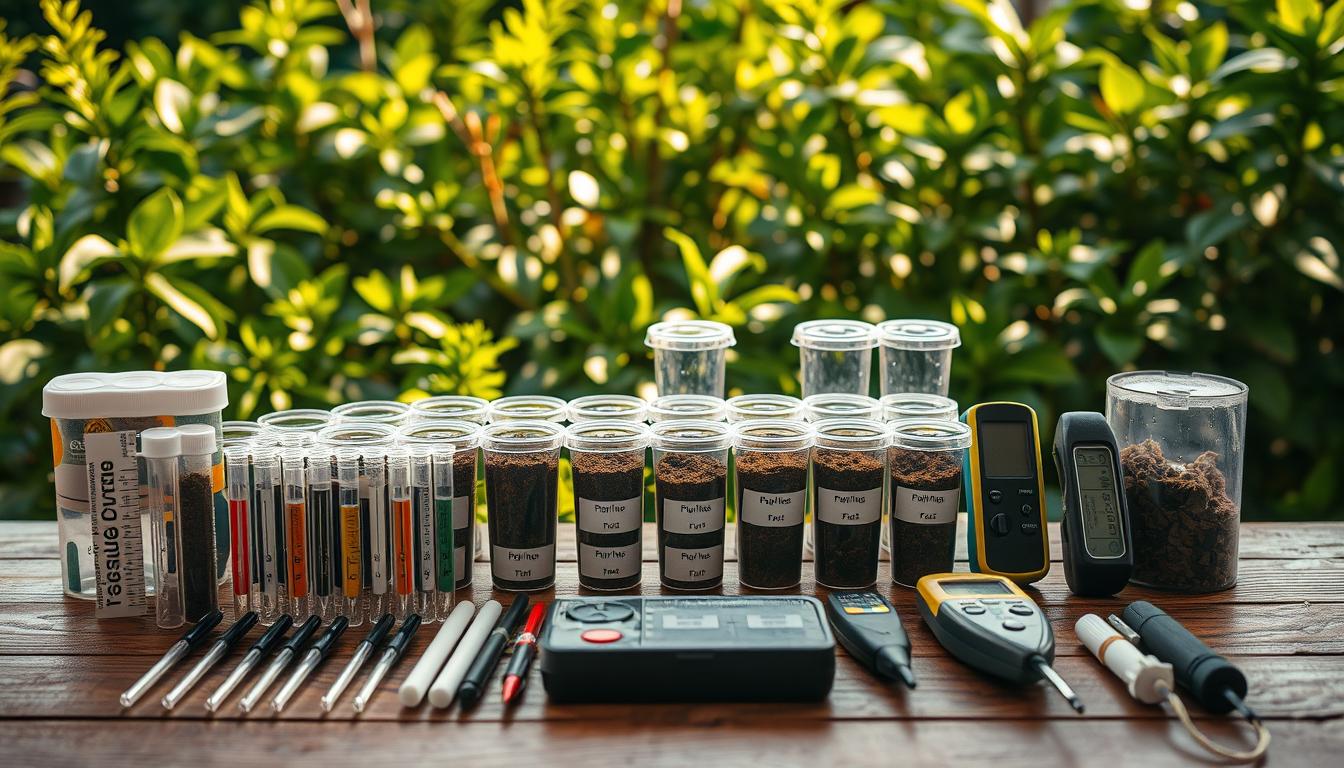
Soil Testing Kits: The Gardener’s Essential Tool
Soil testing kits are a key tool for gardeners. They help understand soil composition, which is crucial for plant growth. Knowing your soil’s makeup is essential for gardening success.
What Exactly Are Soil Testing Kits?
Soil testing kits analyze your garden soil’s chemical and physical properties. They measure pH level, nitrogen, phosphorus, and potassium content. These are the nutrients that plants need to grow.
These kits come in two types: chemical color-comparison kits and digital meters. Chemical kits change color when mixed with soil, while digital meters give instant readings.

Some kits also measure secondary nutrients and soil texture. Professional kits can even check for contaminants and biological activity. These factors greatly affect plant health.
Modern home testing kits are easy to use. They provide quick insights into your soil. Most kits come with guides to help you understand your results.
Why Guesswork Is Your Garden’s Worst Enemy
Gardening without testing is like driving blind. You might guess right, but it’s not likely. Many gardeners struggle, thinking they have a “black thumb” when the real problem is soil imbalances.
For example, yellow leaves might seem like a nitrogen problem. But it could be iron deficiency due to high pH levels. Adding more nitrogen won’t fix it and might harm your plants.
Even experienced gardeners can’t guess soil conditions by looking. A garden might look healthy but not be performing well. This can waste money on fertilizers and plants.
The Science Behind Accurate Soil Analysis
Soil testing kits use chemistry and physics to give accurate results. Chemical tests react with nutrients to show their levels. Digital probes measure electrical conductivity and chemical reactions.
Soil testing science has improved a lot. Modern kits are as accurate as lab tests, helping gardeners get the best results.
Debunking Common Soil Testing Myths
Many gardeners avoid testing due to myths. You don’t need a science degree to understand the results. Testing is not just for vegetable gardens; all plants benefit from it.
Another myth is that experienced gardeners can guess soil quality. While texture and appearance are clues, they don’t show chemical composition. Even experts test regularly to keep their gardens in top shape.
| Soil Parameter | What It Measures | Why It Matters |
|---|---|---|
| pH Level | Soil acidity/alkalinity (1-14 scale) | Determines nutrient availability; most plants prefer 6.0-7.0 |
| Nitrogen (N) | Available nitrogen content | Critical for leaf growth and green color |
| Phosphorus (P) | Available phosphorus content | Essential for root development and flowering |
| Potassium (K) | Available potassium content | Improves overall plant health and disease resistance |
The Real Cost of Not Testing Your Soil
Every untested garden soil hides a hidden cost. It includes wasted resources, failed plants, and harm to the environment. Most gardeners don’t realize this. Soil testing kits are often overlooked, but they are crucial for your garden’s health.
Financial Losses from Poor Plant Performance
Not testing your soil is like gambling with your money. Every dollar you spend on plants and fertilizers is at risk. Without knowing your soil’s needs, you’re throwing money away.
One failed vegetable garden can cost $200-300 in plants alone. Ornamental shrubs and trees can cost even more. A $20-40 soil testing kit could save you from these losses.
Many gardeners end up in a cycle of spending more money. Plants struggle, so they add more fertilizer. But when that doesn’t work, they replace the plants again. This cycle can be costly.
Not testing your soil also means wasting inputs. Applying unnecessary lime, sulfur, or fertilizers is like throwing money away. Gardeners often spend $50-100 a year on things their gardens don’t need.
Environmental Impact of Improper Fertilization
Skipping soil tests has bigger consequences than just your garden. Blindly applying fertilizers can harm our communities and ecosystems.
Unused fertilizers don’t just disappear. They become pollutants that harm our environment. This is a problem scientists and gardeners are starting to understand.
Water Pollution from Excess Nutrients
When rain washes fertilizers away, they can pollute waterways. Nitrogen and phosphorus, meant for plants, become pollutants. This causes “dead zones” where fish and other aquatic life can’t survive.
The Chesapeake Bay and Gulf of Mexico show the damage of poor gardening practices. Even small gardens contribute to this problem if soil isn’t tested.
Carbon Footprint of Unnecessary Garden Amendments
Fertilizers and soil amendments have a hidden carbon cost. Making synthetic fertilizers requires a lot of energy. Transporting them adds more emissions.
Applying unnecessary fertilizers harms the environment. A single bag of fertilizer can release 2-3 kg of carbon emissions. This adds up across millions of gardens, harming our climate.
| Cost Category | Without Soil Testing | With Regular Soil Testing | Potential Savings |
|---|---|---|---|
| Plant Replacement | $150-300 annually | $50-100 annually | $100-200 |
| Fertilizer Waste | $75-125 annually | $25-50 annually | $50-75 |
| Water Usage | $100-200 annually | $50-100 annually | $50-100 |
| Environmental Impact | High | Low | Significant |
Types of Soil Testing Kits Available for Home Gardeners
Home gardeners today have many soil testing kits to choose from. Each kit has its own benefits and uses. Whether you’re new to gardening or have been growing for years, there’s a kit for you. Knowing the differences will help you pick the right one for your garden.
Digital vs. Chemical Testing Options
The market offers two main types: digital and chemical testing kits. Each has its own advantages for different gardening needs.
Digital kits use sensors for quick soil readings. They measure pH, moisture, and more. Kits like the Rapitest Digital Soil Test Kit give fast results without chemical reactions.
Digital testers are easy to use and reusable. But, they cost more, from $30 to $200.

Chemical kits use color-changing reagents for soil analysis. Kits like the Luster Leaf 1601 Rapitest are affordable and reliable.
Chemical kits are cheaper upfront, from $10 to $50. But, they need to be replaced and take more time to use. They offer detailed soil analysis when done right.
Comprehensive vs. Specialized Testing Kits
There’s a big difference between all-in-one and specialized kits. Your choice depends on what you need to know about your soil.
All-in-one kits test many soil parameters at once. They’re great for a full soil profile. Kits like the Luster Leaf 1662 give a detailed view of your soil.
These kits are perfect for starting a new garden or solving many problems. They’re essential for a complete soil health check.
Specialized kits focus on specific soil aspects. You can find kits for pH, nitrogen, or moisture. These tools help you track what’s important for your plants.
For example, a pH meter is great for acid-loving plants. A nitrogen test can quickly show if your plants need more nitrogen.
Budget-Friendly Options for Beginners
New gardeners don’t need to spend a lot on testing tools. Basic pH test strips cost $5-15 and are very useful. The Sonkir Soil pH Meter offers moisture, pH, and light readings for under $20.
Color-changing capsule tests like the Ferry-Morse Soil Test Kit are also affordable. They cost about $15 for multiple tests. These tools are simple but help beginners make good decisions.
Professional-Grade Kits for Serious Gardeners
For those who want lab-quality results, there are high-end kits. The Luster Leaf 1605 Professional Soil Test Kit is accurate and costs around $50. The Hanna Instruments Soil Test Kit offers digital accuracy with replaceable reagents.
Premium kits like the Apera Instruments AI311 even connect to apps for tracking soil changes. While they cost $75-200, they’re worth it for serious gardeners who value accuracy.
| Test Kit Type | Price Range | Best For | Testing Time | Reusability |
|---|---|---|---|---|
| Basic Chemical Strips | $5-15 | Beginners, pH only | 2-10 minutes | Single use (10-40 tests) |
| Digital Probes | $20-50 | Regular monitoring | Instant | Years (battery dependent) |
| Comprehensive Chemical | $25-60 | Complete soil analysis | 10-30 minutes | Limited (40-80 tests) |
| Professional Digital | $75-200 | Precision gardening | Instant to 5 minutes | Years with replaceable parts |
Essential Soil Parameters Every Gardener Should Monitor
Knowing the right soil parameters is key to a thriving garden. Just like doctors check vital signs, gardeners need to monitor soil indicators. This ensures the best growing conditions for your plants.
Understanding Soil pH and Its Critical Role
Soil pH is crucial for your garden’s health. It ranges from 0-14, showing if your soil is acidic or alkaline. Most plants do well in slightly acidic soil, between 6.0 and 7.0.
Soil pH affects how plants get nutrients. Even with plenty of nutrients, plants can still starve if the pH is off. For example, blueberries need acidic soil to get iron, while asparagus prefers slightly alkaline soil for phosphorus.
A soil pH test kit is essential. If your soil’s pH is wrong, you can adjust it. For acidic soil, add lime or wood ash. To lower pH, use sulfur, pine needles, or peat moss. These changes happen slowly, so test often.
Key Nutrients: Nitrogen, Phosphorus, and Potassium
The NPK trio—nitrogen, phosphorus, and potassium—is vital for plants. A soil nutrient test measures these elements.
Nitrogen helps plants grow leaves and is crucial for veggies. Too little nitrogen can cause yellow leaves. Most gardens need moderate to high nitrogen levels.
Phosphorus supports roots, flowers, and fruits. Without enough phosphorus, plants may have purplish stems and grow slowly. Tomatoes and peppers need enough phosphorus.
Potassium boosts plant strength, disease resistance, and cold tolerance. Deficiency can cause brown leaf edges and weak stems. Fruit-bearing plants and root crops need enough potassium.
Secondary Nutrients and Micronutrients Worth Testing
Other nutrients like calcium, magnesium, and sulfur are also important. Calcium prevents blossom end rot in tomatoes. Magnesium helps with chlorophyll, and sulfur is key for proteins.
Micronutrients like iron, manganese, zinc, copper, and boron are needed in small amounts. Iron deficiency can turn leaves yellow, often in alkaline soils. These micronutrients are crucial for plant health.
Advanced soil testing kits can find these nutrients. While basic tests cover most needs, detailed tests are useful for specific issues or specialized gardens.
How to Use Soil Testing Kits Effectively
Unlocking your garden’s full potential starts with knowing how to use soil testing kits. Even the most advanced testing kit can yield misleading results if used incorrectly. The good news is that with a few simple techniques, any home gardening enthusiast can perform accurate DIY soil tests. These tests provide valuable insights into their garden’s needs.

Step-by-Step Testing Process for Accurate Results
Successful soil testing follows a logical sequence that ensures reliable results. Begin by reading the instructions that came with your kit completely—each brand may have slight variations in their testing procedures. Most kits will require you to collect soil samples, prepare them properly, and then follow specific testing protocols for each soil parameter.
For chemical test kits, you’ll typically mix soil with water or a testing solution, wait for a color change, and then compare that color to a chart. Digital meters usually require insertion directly into moist soil, followed by a short waiting period for the reading to stabilize. Record your results immediately and keep them organized by garden area for future reference.
Proper Soil Sampling Techniques
The quality of your soil sample directly affects the accuracy of your test results. Use clean tools to collect samples from 4-6 inches deep, avoiding areas near paths, buildings, or recent fertilizer applications. Take multiple samples from different parts of your garden bed, mix them thoroughly in a clean plastic bucket, and remove any stones, roots, or debris before testing.
Testing Conditions for Optimal Accuracy
Timing matters when conducting DIY soil tests. Test when soil is moderately moist but not waterlogged—ideally 2-3 days after rainfall. Avoid testing immediately after fertilizing or liming, as this can skew results. Temperature also affects readings, so aim for testing when soil is between 50-85°F for most accurate results. Morning testing often provides more consistent readings than afternoon tests.
When and How Often to Test Your Garden Soil
Testing frequency depends on your gardening intensity and goals. For vegetable gardens, testing twice yearly—once in early spring before planting and again in fall—provides valuable information for seasonal adjustments. Perennial beds benefit from annual testing, ideally in early spring before new growth begins.
New garden areas should always be tested before planting to establish a baseline and identify any major issues requiring correction. If you’re experiencing specific plant problems or have recently amended your soil significantly, additional testing can help track changes and guide further adjustments.
Gardeners in the northern United States often find fall testing most beneficial, as it allows time for soil amendments to work over winter. Southern gardeners may prefer early winter testing to prepare for earlier spring planting seasons. Regardless of your region, consistent testing at the same time each year helps track soil health trends over time.
Interpreting Your Soil Test Results Like a Pro
Learning to read soil test results is key to a successful garden. It turns confusing data into a clear plan for your garden. With practice, you’ll understand how to use this information to improve your garden’s health and growth.
Making Sense of the Numbers and Color Changes
Soil test kits give you results in different ways. Digital meters show numbers, while chemical kits change color. These changes and numbers tell you a lot about your soil.
Digital pH meters show readings from 0 to 14, with 7 being neutral. Numbers below 7 mean your soil is too acidic. Numbers above 7 mean it’s too alkaline. Nutrient meters show readings as “low,” “medium,” or “high.”
Chemical test kits use a color chart. Match your sample’s color to the chart to get your reading. If your color is between two options, your soil is in between those values.
Here’s a quick guide to help you understand common soil test results:
| Test Parameter | Ideal Range | Low Reading Indicates | High Reading Indicates | Testing Method |
|---|---|---|---|---|
| Soil pH | 6.0-7.0 (most plants) | Acidic soil (below 6.0) | Alkaline soil (above 7.0) | Digital meter or color indicator |
| Nitrogen (N) | Medium to high | Yellowing leaves, stunted growth | Excessive foliage, poor flowering | Chemical color change |
| Phosphorus (P) | Medium | Poor root development, purple stems | Potential runoff pollution | Chemical color change |
| Potassium (K) | Medium to high | Weak stems, poor drought resistance | Rarely problematic | Chemical color change |
| Soil Texture | Loamy | Sandy (drains too quickly) | Clay (poor drainage) | Manual test or specialized kit |
Common Soil Imbalances and What They Mean
Soil analysis often shows imbalances that affect plant health. Knowing these common issues helps you fix them. Most garden problems come from a few soil conditions that your test kit can spot.
When looking at your soil test results, look for patterns. Sometimes, fixing your pH can solve what seems like a nutrient problem.
pH Imbalances and Their Effects on Plants
Soil pH affects how plants get nutrients. Acidic soil (below 6.0) makes it hard for plants to get nitrogen, phosphorus, and potassium. Micronutrients like iron can become toxic.
In alkaline soil (above 7.5), plants may get iron chlorosis, showing yellow leaves. Phosphorus and most micronutrients are locked in the soil, unavailable to plants. Blueberries and azaleas like acidic soils, while lavender and some herbs prefer slightly alkaline.
Nutrient Deficiencies vs. Toxicities
Too little or too much of any nutrient can harm plants. Nitrogen deficiency causes yellow leaves and stunted growth. Too much nitrogen leads to lush foliage but few flowers or fruits.
Phosphorus deficiency shows as purple leaves and stems, mainly in young plants. Too much phosphorus can block zinc and iron, causing secondary deficiencies. Potassium deficiency causes brown scorching on leaves, while calcium deficiency leads to blossom end rot in fruits like tomatoes.
Soil testing is about creating the best growing environment for your plants. With each test, you’ll get to know your soil better and feel more confident in interpreting the results.
Transforming Your Garden Based on Test Results
Soil test data is key to improving your garden. Knowing what your soil needs lets you make targeted changes. These changes boost plant health and garden productivity.
Correcting imbalances and adding nutrients are crucial. With a plan based on test results, even tough soil can thrive. Let’s see how to use test results for a garden makeover.
Correcting Soil pH Issues Naturally
Soil pH is vital for plant health. You can adjust pH naturally with common materials. For acidic soil, add:
- Garden lime: Apply 5-10 pounds per 100 square feet to raise pH by about one point
- Wood ash: Sprinkle 1-2 pounds per 100 square feet (use cautiously as it works quickly)
- Crushed eggshells: Add to compost or directly to soil for a slow-release calcium boost
For alkaline soil, try these:
- Elemental sulfur: Use 1-2 pounds per 100 square feet to lower pH gradually
- Pine needles or oak leaf mulch: Apply as a 2-3 inch layer around acid-loving plants
- Coffee grounds: Mix into soil at a rate of 1/2 pound per square foot
Remember, pH changes take time. Re-test your soil after applying amendments to track progress.
Addressing Nutrient Deficiencies Effectively

Soil nutrient tests reveal what your soil lacks. Quick fixes and long-term solutions are needed. Water-soluble fertilizers provide immediate nutrients. For lasting improvement, focus on building soil fertility naturally.
Common deficiencies and their solutions include:
| Nutrient | Deficiency Signs | Quick Fix | Long-term Solution | Application Rate |
|---|---|---|---|---|
| Nitrogen (N) | Yellowing leaves, stunted growth | Fish emulsion or blood meal | Compost, legume cover crops | 2-3 lbs per 100 sq ft |
| Phosphorus (P) | Purple stems, poor flowering | Bone meal | Rock phosphate, compost | 3-4 lbs per 100 sq ft |
| Potassium (K) | Brown leaf edges, weak stems | Greensand or wood ash | Kelp meal, compost | 5 lbs per 100 sq ft |
| Calcium (Ca) | Blossom end rot, leaf curling | Gypsum | Limestone, eggshells | 5-10 lbs per 100 sq ft |
| Magnesium (Mg) | Yellowing between leaf veins | Epsom salts | Dolomitic lime | 1-2 lbs per 100 sq ft |
Apply amendments based on your test results, not general recommendations. Over-application can create new problems and waste resources. For severe deficiencies, consider a two-phase approach: a quick-fix solution for the current growing season followed by long-term soil building.
Creating Custom Soil Amendment Plans
Every garden is unique, so your soil improvement strategy should be tailored to your specific conditions. Start by prioritizing the most critical issues identified in your soil nutrient test. Often, correcting pH comes first since it affects how well plants can access other nutrients.
Create a timeline for improvements, recognizing that some changes happen quickly while others take seasons to fully develop. Document your starting point with photos and notes so you can track progress over time. A well-designed soil amendment plan typically includes:
- Priority issues to address first
- Specific amendments with application rates and timing
- Follow-up testing schedule
- Expected timeline for visible improvements
Organic vs. Synthetic Amendment Options
Both organic and synthetic amendments can improve soil, but they work differently. Organic options like compost, manure, and bone meal release nutrients slowly and build soil structure over time. They support beneficial soil microbes that enhance plant health naturally. Synthetic fertilizers deliver precise nutrient ratios immediately but don’t improve soil structure and may harm soil biology with repeated use. Many gardeners find a middle path works best—using organic methods for long-term soil building while occasionally supplementing with synthetics for specific needs.
Seasonal Adjustment Strategies
Timing matters when amending soil. Fall is ideal for adding lime, compost, and slow-release amendments, giving them time to integrate before spring planting. Spring is better for quick-acting fertilizers that support active growth. Summer calls for light feeding and mulching to retain moisture and suppress weeds. Winter is perfect for soil testing and planning next year’s amendment strategy. By working with the seasons, you maximize the effectiveness of your soil improvements and create optimal conditions for plant health year-round.
Real Success Stories: Gardens Transformed by Soil Testing
Many gardeners have seen their gardens change for the better thanks to soil testing. They’re not experts with fancy tools. They’re just regular people who decided to test their soil instead of guessing. Their stories show how this simple tool can make gardens and lawns flourish.
From Struggling Vegetables to Abundant Harvests
Maria from Michigan had trouble with her tomato plants for three years. They barely produced any fruit, even though she took great care of them. A soil test showed her garden’s pH was too high for tomatoes, so she added sulfur to lower it.
“The change was amazing,” Maria said. “My tomatoes tripled in the next season, and they looked healthier than ever.” The test also found her soil lacked phosphorus, which is key for fruit growth. Adding the right amendment fixed this problem without wasting money.
Robert in Texas had a similar problem with his vegetable garden. His soil was compacted and lacked organic matter. Based on the test results, he added compost and grew cover crops in the off-season. A year later, his soil was better, and his vegetable production increased by 65%.
Lawn Transformations Through Proper Soil Management
Soil testing can also make a big difference in lawn care. Jennifer from Pennsylvania had a lawn with patchy grass and weeds, despite regular care. A soil test showed her lawn was too acidic and lacked potassium.
After adding lime and a potassium-rich amendment, Jennifer saw big changes. “In three months, the bare spots filled in, and weeds were less of a problem,” she said. Her neighbors thought she’d hired a lawn service, but it was just fixing the real issues.
In Arizona, Michael’s bermudagrass lawn was yellowing, despite regular fertilizing. A soil test showed too much phosphorus and not enough iron. Switching to iron supplements and stopping phosphorus use made his lawn green again, using 40% less fertilizer.
Before and After: Measurable Garden Improvements
Soil testing can lead to big improvements in gardens. Vegetable yields often increase by 30-70% in the first season. Flowering plants may produce 25-50% more blooms, and lawns can see up to 80% fewer bare spots in a single season.
Plant diseases can decrease by 40-60% when soil conditions are right. Plants also grow stronger roots, better handling drought and too much rain.
Cost Savings Achieved Through Proper Soil Testing
Soil testing can also save money. Most gardeners pay back the cost of their testing kit in one season, thanks to less fertilizer spending. They often cut their amendment costs by 30-50%.
Water bills also go down, as amended soils need 20-40% less water. And, there’s less need to buy new plants, saving money on replacements.
| Garden Element | Before Soil Testing | After Soil Testing | Improvement |
|---|---|---|---|
| Vegetable Yield | 12 lbs tomatoes/plant | 35 lbs tomatoes/plant | 192% increase |
| Lawn Health | 30% bare patches | 5% bare patches | 83% reduction in problem areas |
| Fertilizer Costs | $120/season | $65/season | 46% savings |
| Plant Replacement | 15 plants/season | 3 plants/season | 80% reduction |
| Water Usage | 2,500 gallons/month | 1,700 gallons/month | 32% reduction |
Your Garden Deserves Better: Making Soil Testing a Priority Today
Think about all the time and money you put into your garden every year. You spend on seeds, plants, tools, and countless hours of care. But without knowing what’s under the surface, you’re gardening without sight.
Soil testing kits can lift this veil. For a small price, they show you what’s really going on in your garden. Many gardeners think it’s too hard or takes too much time. But, most tests are quick and easy to understand.
Getting started is easy. Buy a basic kit that checks pH and the main nutrients (N-P-K). Take samples from different spots in your garden. Follow the kit’s instructions, and you’ll get useful info fast.
Don’t just test once. Make it a part of your gardening routine. Test in early spring and again in fall. This way, you can see how your garden is improving and catch any issues early.
Picture your garden next year: full of vibrant flowers and bountiful veggies. You’ll enjoy gardening more with less trouble. This is what happens when you really know and work with your soil.
Your garden is ready for better care. Get a soil testing kit this week. Start your journey from guessing to gardening with science.