I’m excited to share with you the benefits of vermicomposting for zero waste. This practice has changed how I garden and manage waste. It lets me turn kitchen scraps into nutrient-rich compost for my garden.
The benefits of vermicomposting are many. I’m excited to share how it can improve your gardening.
Vermicomposting is a key to zero waste. I’ve seen its positive effects on my garden and the environment. It helps reduce waste and promotes sustainable gardening.
I’ll share my knowledge on vermicomposting benefits. I’ll also guide you on starting this exciting practice.
What is Vermicomposting?
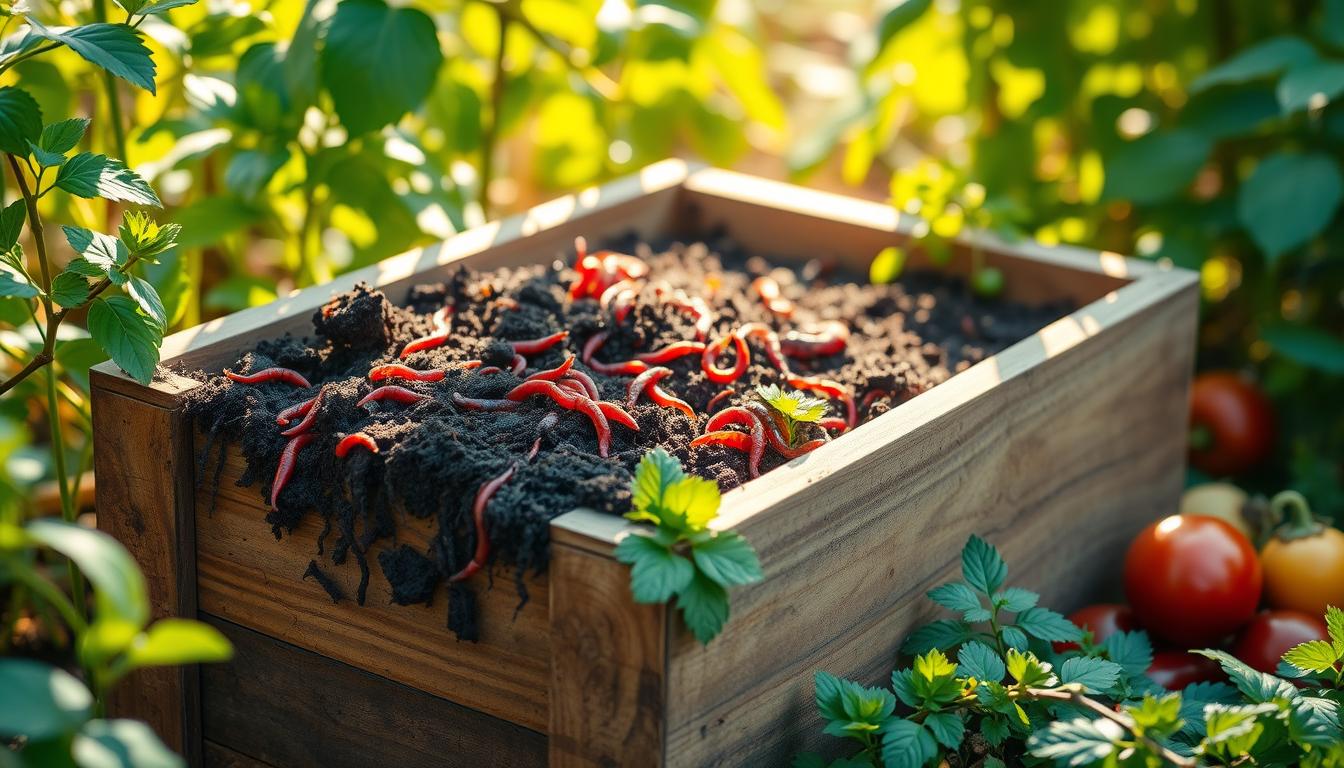
Vermicomposting is a cool way to turn organic waste into a nutrient-rich compost using worms. To start, you need to know the basics. You’ll set up a bin and add red wiggler worms, perfect for this job. As they work, they make compost full of nutrients.
Worms are key in composting, breaking down waste and making compost. Learning about vermicomposting lets you do it at home. Here are some first steps:
- Setting up a bin specifically designed for vermicomposting
- Adding red wiggler worms to the bin
- Providing the worms with a consistent supply of organic matter to break down
By following these steps, you can start enjoying the benefits of vermicomposting. It’s a green way to cut down waste and make compost for your garden.
Understanding Vermicomposting Basics
Starting with vermicomposting is easy once you know the basics. It’s all about understanding worms’ role and setting up a bin. This lets you use this green practice at home.
The Role of Worms in Composting
Red wigglers are the worms used in vermicomposting. They’re great at breaking down organic matter. Their work is vital for making compost full of nutrients.
Benefits of Vermicomposting for Zero Waste
Vermicomposting is great for cutting down on waste. It lets me turn kitchen scraps into something useful. This way, I can help the environment and make my garden healthier.
There are many good things about vermicomposting. One big plus is it helps reduce kitchen waste. Here are some key benefits:
- Reducing kitchen scraps and minimizing waste
- Creating a nutrient-rich compost that can be used to fertilize gardens
- Saving money on fertilizers and creating a more sustainable gardening practice
Using vermicomposting improves soil quality. It makes my plants grow better. It also saves me money on fertilizers. Vermicomposting is a smart choice for anyone wanting to reduce waste and garden sustainably.

Setting Up Your Vermicomposting Bin
To start vermicomposting, you need a good bin. Choose the right bin, pick the best worms, and make sure the place is right. A bin with good air and a tight lid keeps pests out and worms happy.
Red wigglers are top for vermicomposting. They break down food well and like different conditions. Knowing what worms need is key for a good bin setup.
Selecting the Right Bin
The bin should be cool, dark, and moist. This keeps worms healthy and active. Look for a bin that’s the right size, made of good material, and has good air flow.
Choosing the Best Worms
Red wigglers are best for vermicomposting. They break down food fast and are easy to care for. Make sure to pick healthy worms and give them a good home.
Location and Conditions
The bin’s location and conditions are very important. It should be in a spot that’s not too sunny or too hot. Keep the temperature between 55-77°F (13-25°C) for the worms. Follow these tips to set up a great vermicomposting bin and start composting.
Maintaining Your Vermicomposting System
To keep your vermicomposting system running smoothly, it’s key to follow some tips and guidelines. A good vermicomposting guide can help. You should check the moisture, temperature, and pH levels often. This ensures they’re right for the worms.
It’s also important to regularly check on your worms. Make sure they have enough food and are healthy.
Some key things to remember when maintaining your system include:
- Feeding your worms a balanced diet of kitchen scraps, including fruit and vegetable waste
- Adding bedding materials, such as coconut coir or shredded newspaper, to help with moisture control and odor reduction
- Monitoring for pests, such as fruit flies or ants, and taking steps to eliminate them if necessary

By following these tips and using a vermicomposting guide, you can keep your system efficient. Regular maintenance is key to success. With a bit of practice, you’ll become a pro in no time.
What Can Go into Your Vermicomposting Bin?
Exploring vermicomposting, I found it’s key to know what to add to the bin. A balanced ecosystem is vital for worm health. Using online guides and workshops, I learned what’s safe for the bin.
Kitchen waste, like fruit and veg scraps, is perfect for vermicomposting. Here are some examples:
- Fruit peels and rinds
- Vegetable scraps
- Bread and grains
- Coffee grounds and tea bags
But, some items are a no-go. Meat, dairy, and oils can attract pests and smell bad. Being careful about what goes in helps make good compost for my garden.
Adding things like eggshells or shredded newspaper can also enrich the compost. By trying out different materials, I can make my vermicomposting bin a success. This creates a great home for my worms.
Using Worm Castings in Your Garden
Exploring vermicomposting has opened my eyes to its many benefits. Using worm castings in my garden has been a game-changer. It turns them into a nutrient-rich fertilizer that boosts plant growth. This way, I can cut down on synthetic fertilizers and garden more sustainably.
Worm castings can be used in several ways. You can apply them directly to the soil or make a liquid fertilizer, known as worm tea. This liquid can be sprayed on plants or mixed into the soil. Using worm castings offers several advantages, including:
- Improved soil structure and fertility
- Increased plant growth and yields
- Enhanced resistance to pests and diseases
To get the most out of worm castings, knowing how to apply them is key. You can mix them into the soil or use them as a top dressing. For me, using worm castings has transformed my garden. I’m eager to see more of the benefits of vermicomposting.

Adding worm castings to my gardening routine has made my garden ecosystem more balanced and thriving. Whether you’re new to gardening or have been doing it for years, I suggest trying worm castings. You’ll see the benefits of vermicomposting for yourself.
Vermicomposting vs. Traditional Composting
Composting comes in two main forms: vermicomposting and traditional composting. Each has its own benefits and drawbacks. Vermicomposting is quicker, with compost ready in 1-3 months. This makes it perfect for those who want fast results.
Vermicomposting beats traditional composting in the time race. Here’s why:
- Vermicomposting: 1-3 months
- Traditional composting: 3-6 months or longer
This speed advantage makes vermicomposting a top pick for quick composting.
Time Efficiency Comparison
Vermicomposting and traditional composting also differ in nutrient content and space needs. Vermicomposting gives you a compost rich in nitrogen and phosphorus. This is great for gardeners looking to enrich their soil.
Nutrient Differences
Another difference is space. Vermicomposting needs less space than traditional composting. This makes it perfect for small gardens or indoor spots.
Space Requirements
Getting Started with Vermicomposting Today
Vermicomposting might seem hard at first, but it’s easy and rewarding. There are many online resources and guides for beginners. Local communities also offer workshops and support groups for new vermicomposters.
My journey with vermicomposting started with composting kitchen scraps. I was amazed at how fast worms turned waste into nutrient-rich compost. With the right help and tools, you can do the same and cut down your household waste.
So, what are you waiting for? Start your vermicomposting bin today for a greener lifestyle. With patience and the tips from this article, you’ll create a thriving ecosystem in your backyard. Let’s make a cleaner future, one worm bin at a time.